How to Install a Three-Wire Dimmer Switch A Simple Guide for HomeownersUpgrading your light switch to a dimmer can instantly improve the comfort and functionality of your home. If you’re dealing with a three-wire setup, the installation might seem a bit tricky at first, but it’s completely manageable with the right guidance. This topic explains how to install a dimmer switch with three wires using simple language and clear steps.
What Is a Three-Wire Dimmer Switch?
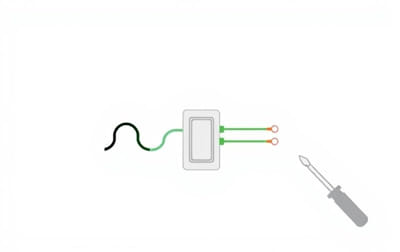
A three-wire dimmer switch is commonly used in modern homes and typically includes the following wires
-
Line (hot) wire – carries electricity from the power source
-
Load wire – sends power to the light fixture
-
Ground wire – protects against electrical faults
In some cases, you might also see a neutral wire, which is usually white. However, many standard dimmer switches don’t require a neutral wire unless they’re designed for smart home systems.
Why Install a Dimmer Switch?
Adding a dimmer switch offers several benefits
-
Adjust lighting to suit different activities
-
Save on energy bills
-
Extend the lifespan of your bulbs
-
Enhance the style and comfort of your room
With the right tools and a little caution, you can install a dimmer switch yourself without calling an electrician.
Tools and Materials Needed
Make sure you have these items on hand before starting
-
Flathead screwdriver
-
Phillips screwdriver
-
Voltage tester
-
Wire stripper
-
Electrical tape
-
Wire nuts
-
Three-wire dimmer switch
Step 1 Turn Off the Power
Go to your electrical panel and turn off the breaker that controls the light switch you’re replacing. This is crucial for your safety. Use a voltage tester to confirm that the power is off before touching any wires.
Step 2 Remove the Existing Switch
Use a screwdriver to remove the wall plate covering the old switch. Unscrew the switch from the electrical box and gently pull it forward to expose the wires.
Step 3 Identify the Wires
Before disconnecting anything, take a close look at how the wires are connected. A typical three-wire setup includes
-
Black wire (line) – brings power into the switch
-
Red or black wire (load) – sends power to the light
-
Green or bare copper wire (ground) – for grounding
Sometimes a white wire (neutral) is also present but not connected to the switch.
If you’re unsure about which wire is which, use your voltage tester to help identify the live (hot) wire.
Step 4 Disconnect the Old Switch
Carefully disconnect each wire from the old switch. Straighten the exposed ends using a wire stripper if necessary. Be sure to keep the wires separated to prevent accidental contact.
Step 5 Connect the Dimmer Switch
Now it’s time to connect the new dimmer switch. Most dimmers will have clearly labeled wires or terminals. Follow these steps
-
Connect the line wire (black) from the wall to the black wire on the dimmer.
-
Connect the load wire (red or black) from the wall to the other black or red wire on the dimmer.
-
Connect the ground wire (green or bare copper) to the green wire or terminal on the dimmer.
If your dimmer has a separate wire for neutral, connect it to the white wire in the box. If not, simply cap the white wire with a wire nut if it’s not in use.
Use wire nuts to secure each connection. After connecting, wrap each wire nut with electrical tape for added safety.
Step 6 Mount the Switch and Cover Plate
Gently fold the wires back into the electrical box, ensuring there’s no excessive pressure on any of the connections. Screw the dimmer switch into place, then reattach the wall plate.
Step 7 Restore Power and Test the Dimmer
Go back to your breaker panel and turn the power back on. Return to the switch and test the dimmer by turning it on and adjusting the brightness level. The light should respond smoothly.
If the light doesn’t work, flickers, or the switch feels warm, turn off the power and double-check your connections.
Common Installation Issues and Fixes
Lights Flicker
This could be caused by using incompatible bulbs. Make sure your dimmer switch supports the type of bulb you’re using, especially if it’s LED or CFL.
Dimmer Feels Hot
It’s normal for dimmers to feel slightly warm. However, if it becomes too hot to touch, you may have an overload. Check the wattage rating on the dimmer and ensure it matches your lighting setup.
Buzzing Sound
Buzzing often happens with low-quality dimmers or bulbs. Try upgrading to a better dimmer or different light bulbs.
Choosing the Right Dimmer for Your Bulbs
Different bulbs require different types of dimmer switches. Here’s what you need to know
-
Incandescent and halogen bulbs Work well with most standard dimmers
-
LED bulbs Use a dimmer specifically labeled LED-compatible
-
CFL bulbs Only use if marked as dimmable and paired with the right dimmer
Using the wrong type of dimmer can result in flickering, limited dimming range, or bulb damage.
Benefits of Doing It Yourself
Installing a dimmer switch yourself saves time and money. You’ll also gain confidence in handling basic home electrical projects. Plus, it gives you the freedom to customize your lighting without waiting for professional help.
Installing a three-wire dimmer switch is easier than it sounds, especially if you take your time and follow each step carefully. Always prioritize safety by cutting off the power and using a voltage tester. Once installed, a dimmer switch can transform the way you use lighting in your home making it more flexible, energy-efficient, and comfortable.
With a few tools and a bit of patience, you can complete this project in under an hour. Whether you’re upgrading a bedroom, living room, or dining area, a dimmer switch is a smart, affordable improvement that pays off right away.